   |
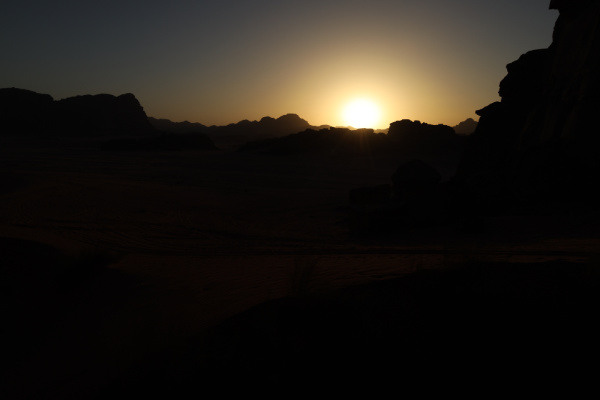
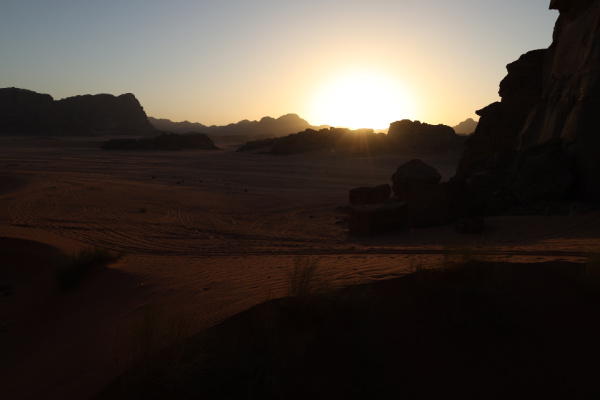
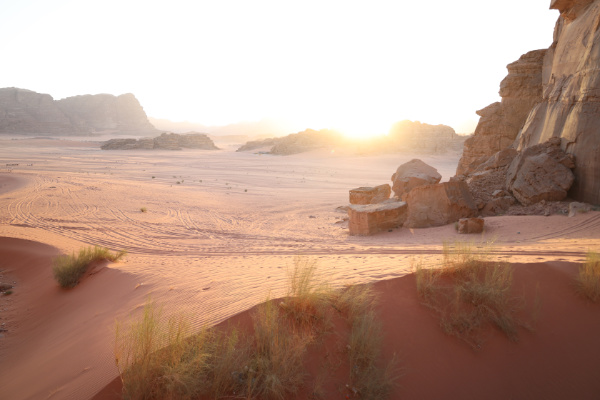
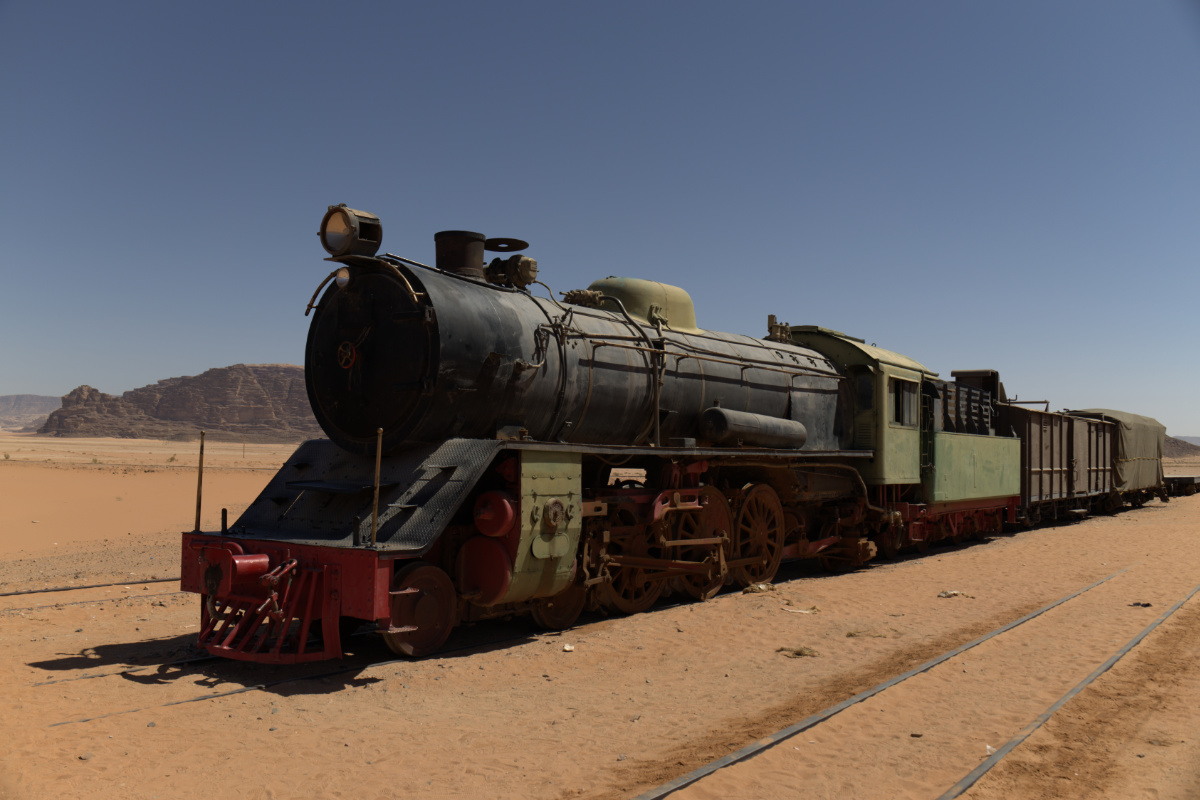
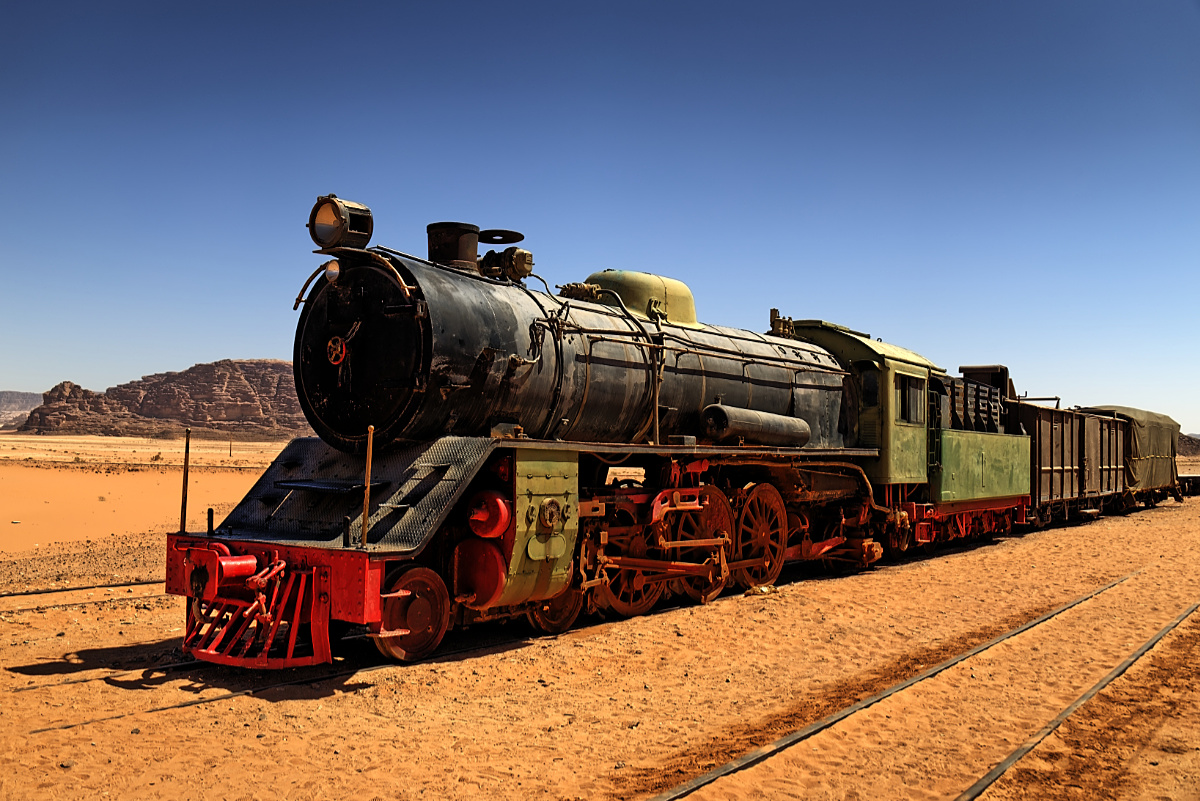
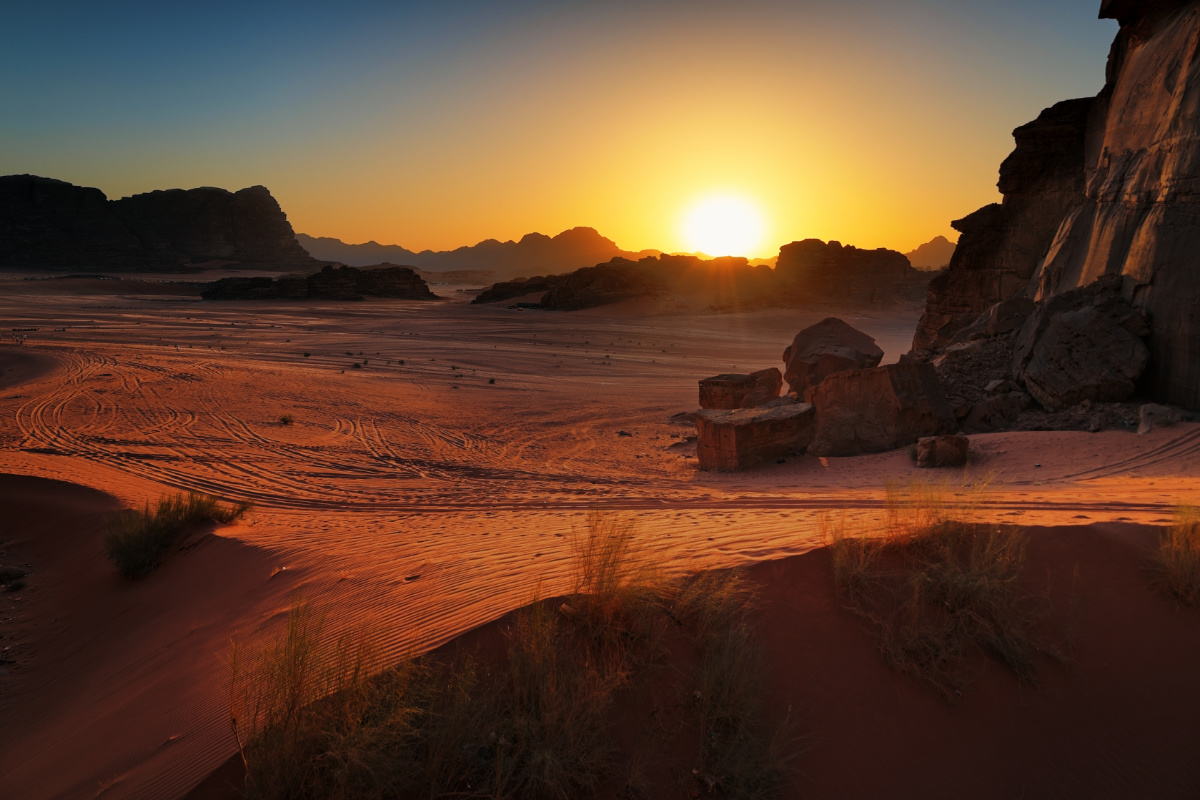 HDR sunset in the Wadi Rum desert, Jordan. Three hand-held AEB shots auto-aligned, merged to HDR and tone mapped with easyHDR. The layers tool has been used to process the ground differently than the sky. © Bartłomiej Okonek |
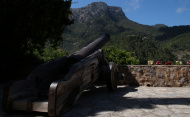 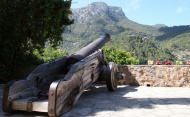 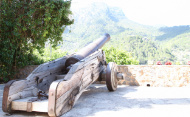 |
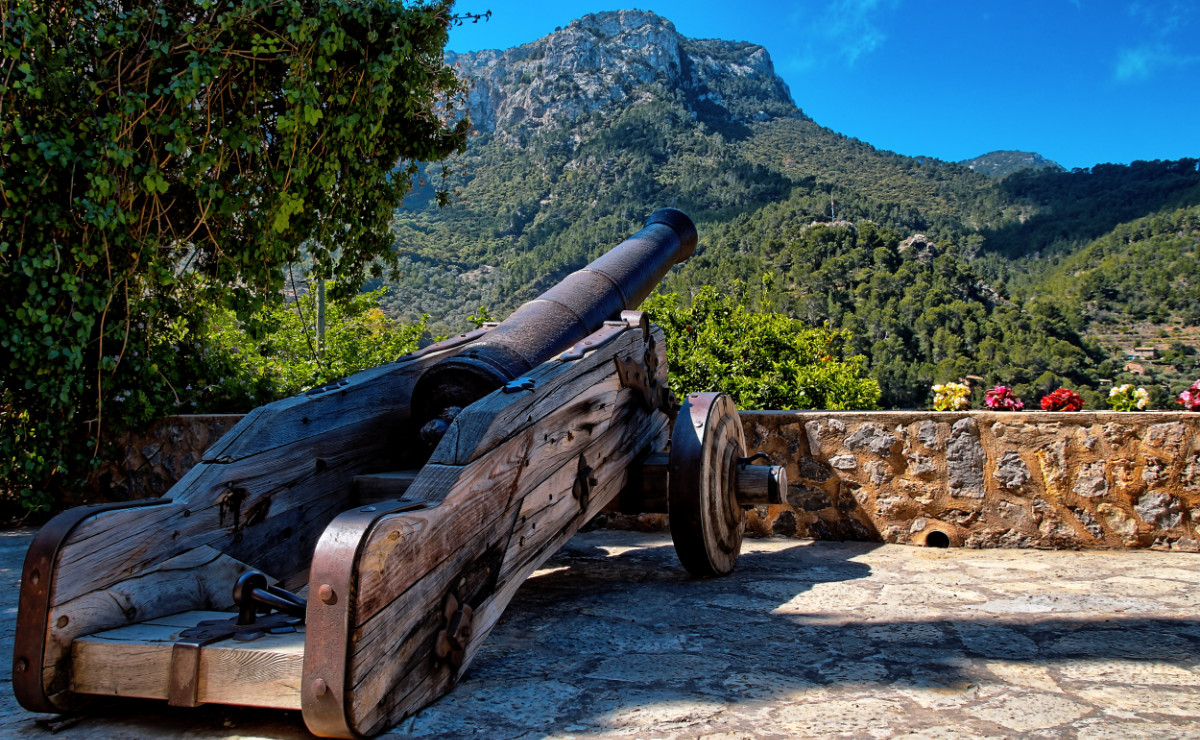 HDR photo taken in the mountain town of Deia. Mallorca, Spain. The HDR sequence of photos was taken hand-held with a zoom lens at 18 mm focal length. EasyHDR automatically fixed lens distortion and chromatic aberrations (which is quite strong with this lens), then the photos were auto aligned. To get the dramatic look, the tone mapping settings similar to the 'dramatic-dark' preset were used. Also a 'BDMFILM BMPC to Rec 709' 3d LUT was used in easyHDR to further boost the colors. Look for free LUTs or paid LUT packs on the Internet, then import them to easyHDR and explore the new possibilities! © Bartłomiej Okonek |
   |
 © Bartłomiej Okonek |
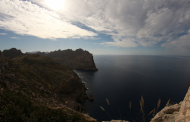  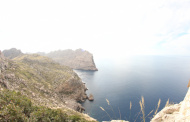 |
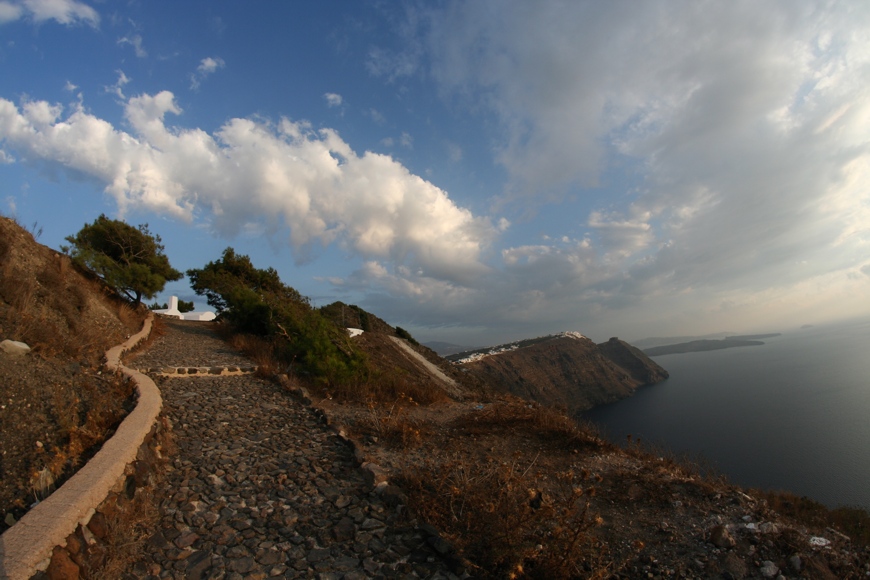
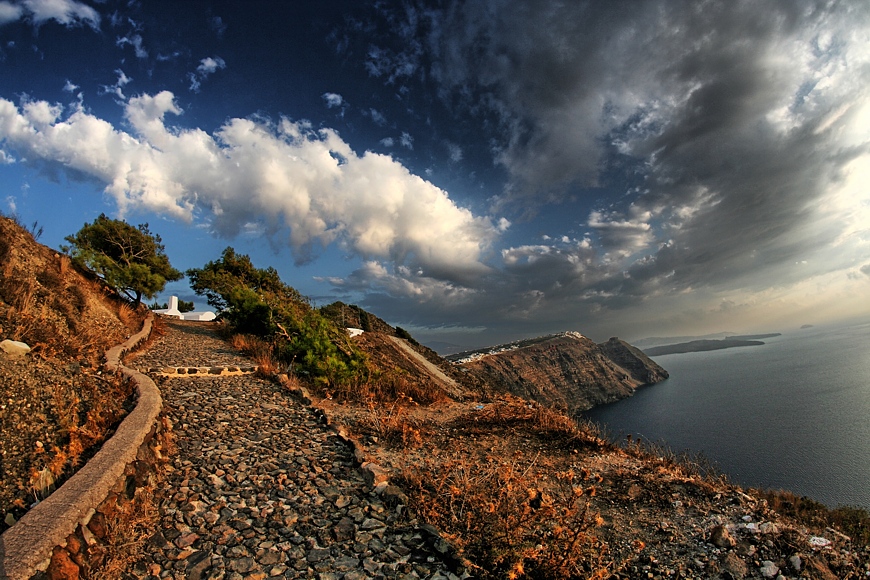
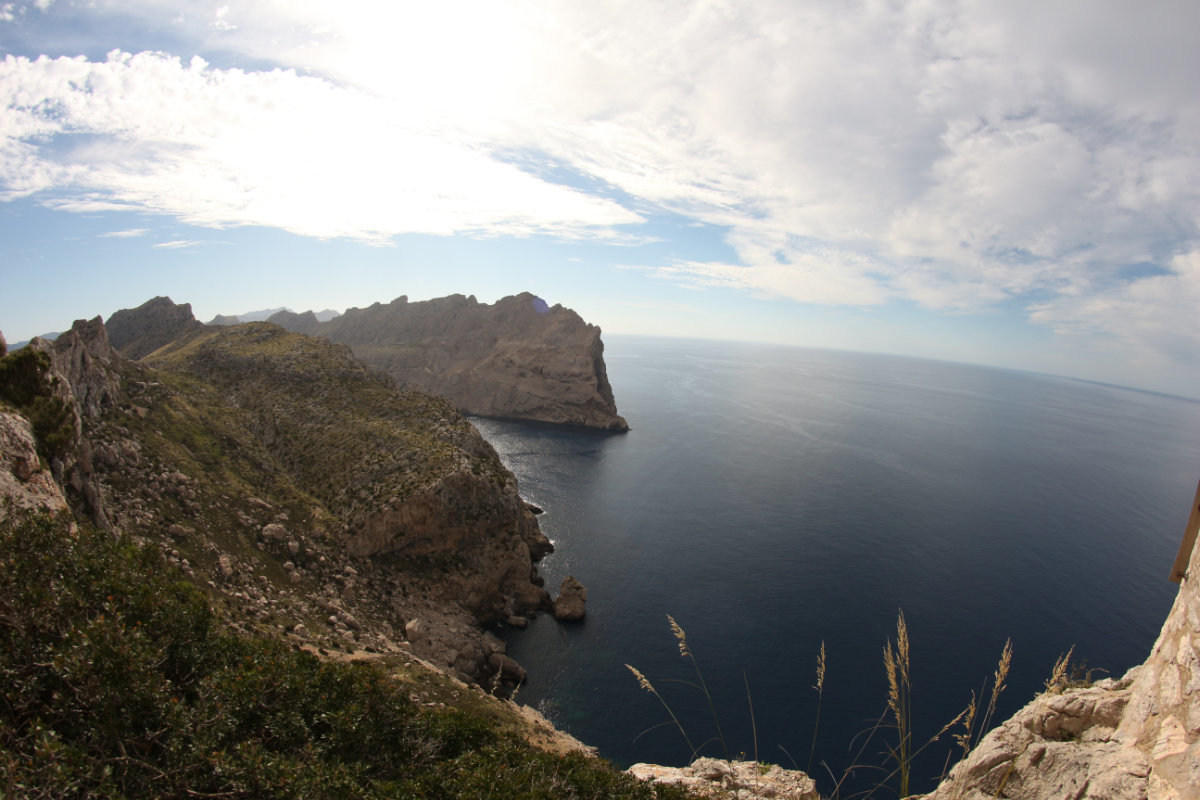
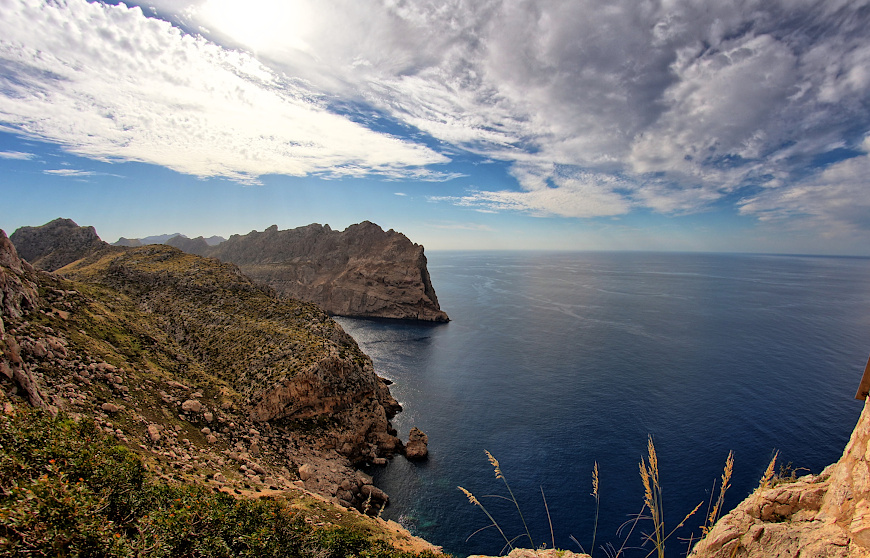 HDR photo taken at the Cap de Formentor. Mallorca, Spain. The HDR sequence of photos was taken hand-held. An 8mm fish eye lens was perfect to catch the wide view, but unfortunatelly introduced strong distortion, causing the horizon to look too much curved (see the original 0 EV photo). EasyHDR did auto align the images and automatically reduced some tiny ghosting in the foreground. At the tone mapping stage, it was possible to correct the lens distortion and to rotate and crop the image. The purple lens flare was also removed with the clone/healing tool. Using the layers tool, the sky was selected with a gradient mask and processed with slightly different settings, mainly to apply different white balancing. © Bartłomiej Okonek |
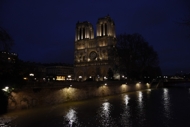 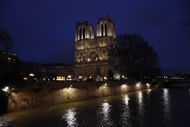 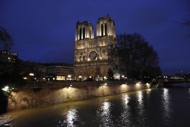 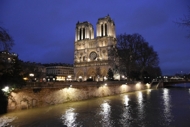 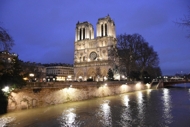 |
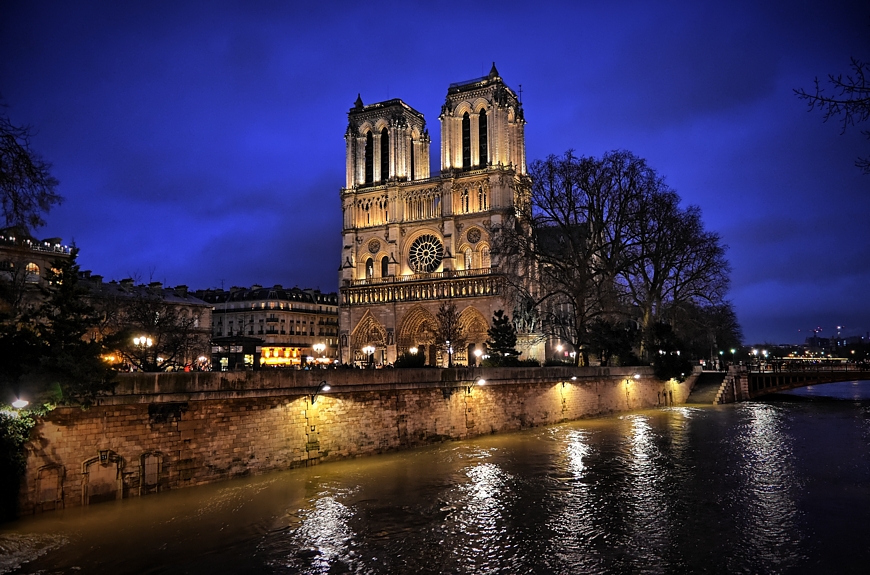 Notre-Dame de Paris - HDR picture merged from 5 bracketed shots spanning from -1.3 to +1.3 EV. This scene does not characterize with very high dynamic range (apart from the lights, which actually take just a fraction of the image). However, the HDR processing with easyHDR, of 5 differently exposed photos, allowed to improve the quality, by merging together the best exposed areas. The noise level has therefore been greatly lowered - especially in the sky and in the shadows. That allowed to boost the local contrasts and make the image look dramatic. The vignetting effect was also very helpful to achieve that. The moving water was a major problem, but was easily overcome with automatic ghost removal. Also the lens distortion has been automatically corrected with easyHDR in order to straighthen the field of view. The sky was processed with slightly different tone mapping settings than the rest of the photograph by using layers. That allowed to better tune the settings, depending on the different characteristics of those two areas. © Frederic Schvartzman |
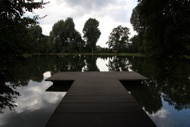 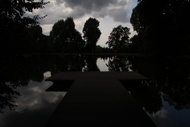 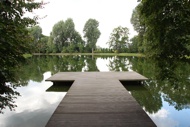 |
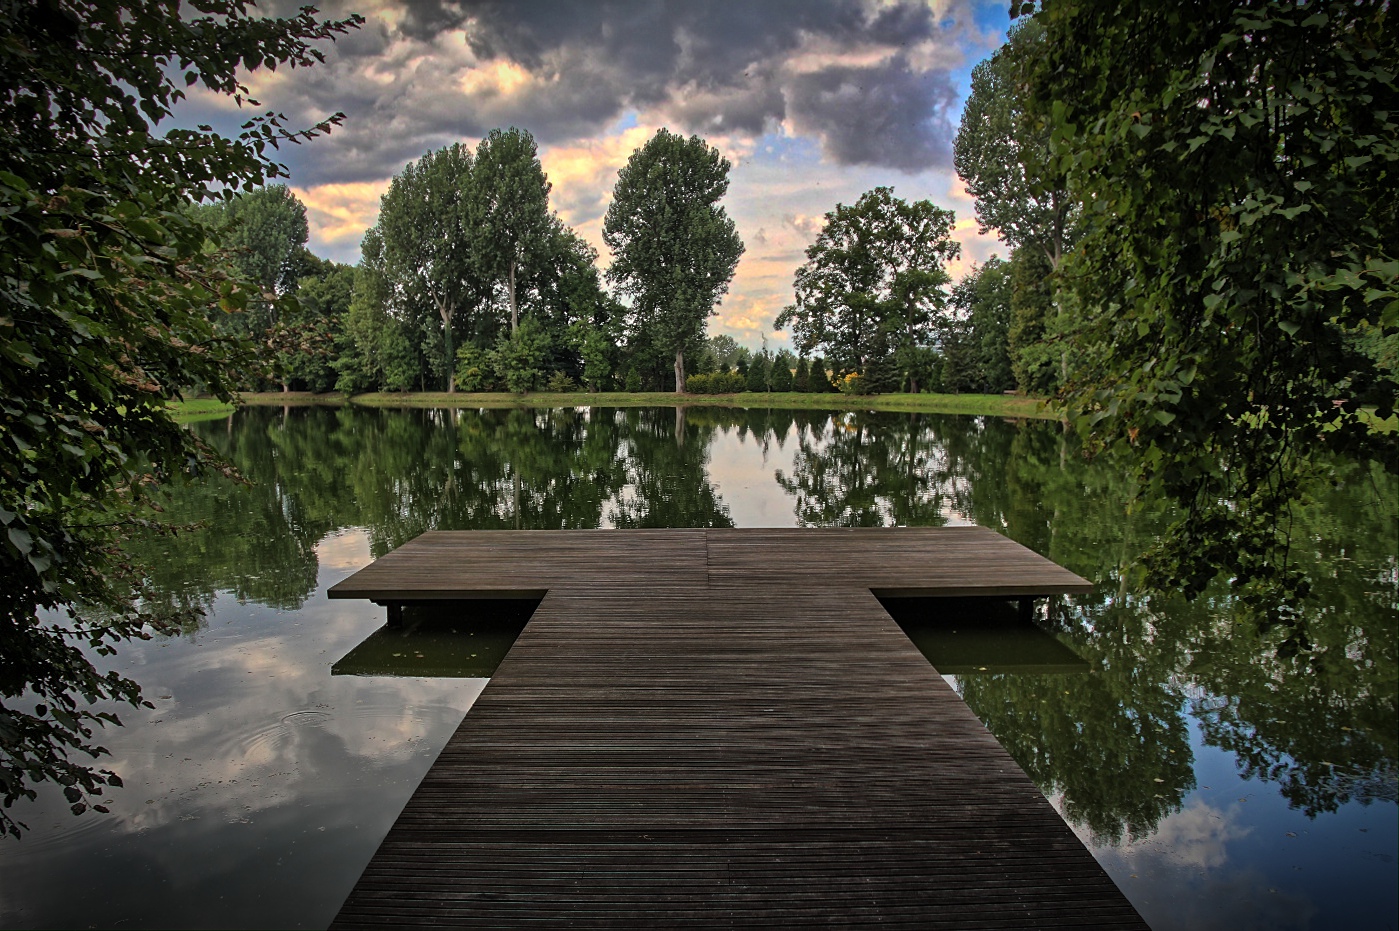 A pond near Topacz Castle on the outskirts of Wrocław, Poland. Dramatic HDR clouds. Three AEB shots spaced by 2EV, merged to HDR image and tone mapped with easyHDR. The sky was processed on a layer, with higher Local Contrast strength in order to make it more dramatic. The pier has also been processed on a different layer, in order to make it darker and therefore make it less distracting. The photos were taken just after the sunset, when the shadows become dark and the sky is still very bright. In the 0 EV shot the sky is blown and the rest is too much underexposed to even try to brighten it with software. That would have brought out noise and color artifacts. Thanks to HDR photo processing, you can control the exposure level of the various areas of the photograph. Download easyHDR project file (17 MB) © Bartłomiej Okonek |
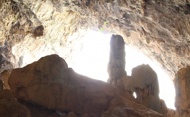   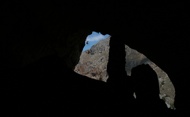 |
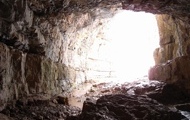
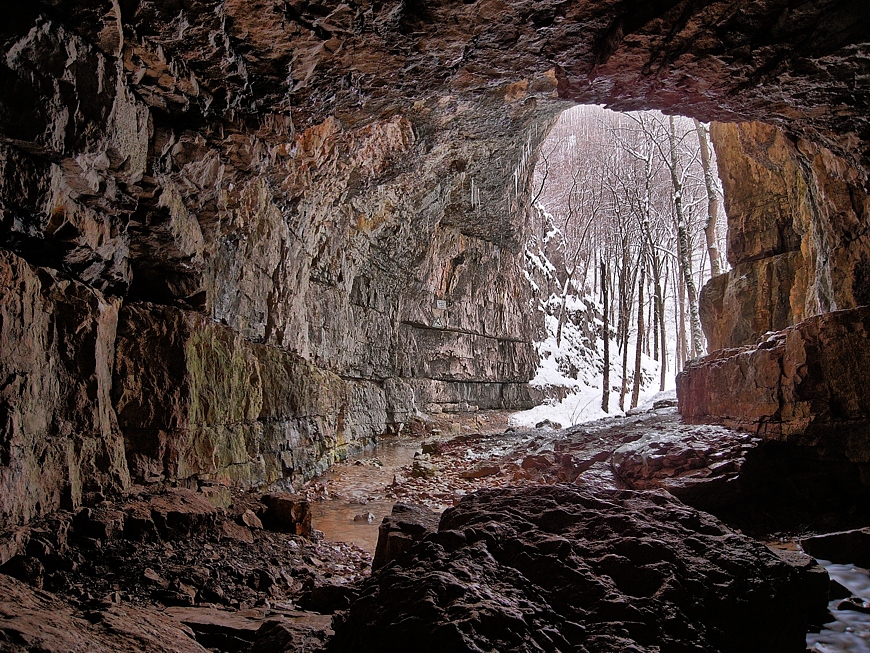
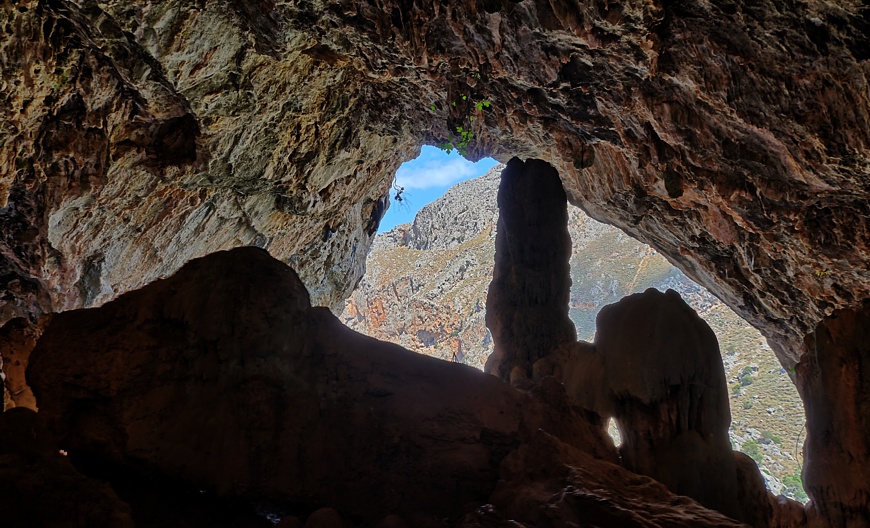 Agia Sofia cave in Topolia gorge, Crete. Extreme dynamic range HDR photo. Every High Dynamic Range scene like this is very hard to be properly photographed. If the cave's interior is to be visible on the photo, the view outside is overexposed. On the other hand, getting properly exposed exterior means that no details inside are visible, or are very noisy. The above result was achieved by combining 11 photos spanning 9EV, taken hand-held. The exposure settings were changed manually, no bracketing was used. EasyHDR aligned the shots and merged them to a HDR image. © Bartłomiej Okonek |
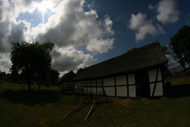 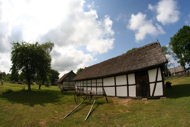 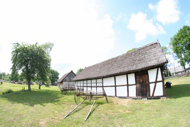 |
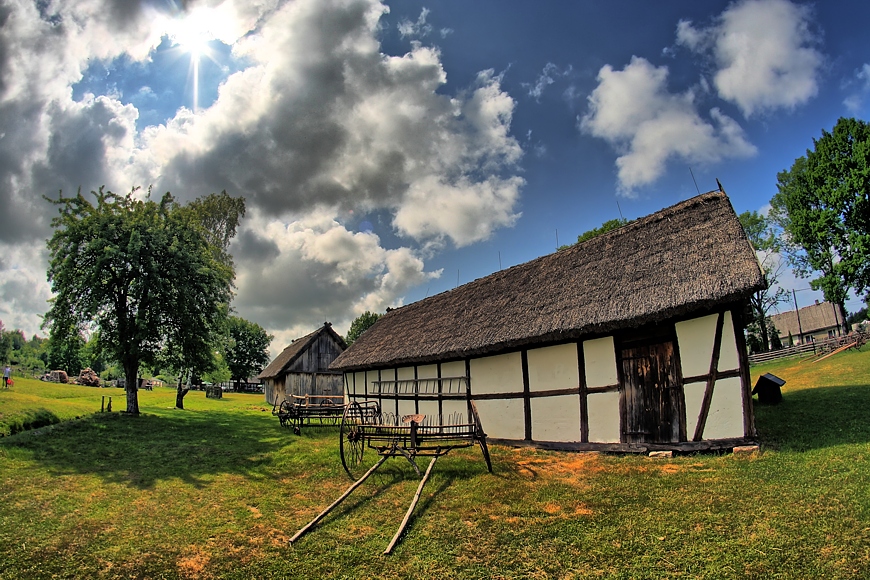 Old cottage house in Kluki open-air museum, Poland. Wide field HDR picture, taken against the Sun. Three photos taken without a tripod, using auto bracketing (AEB). They were loaded into easyHDR and auto aligned to correct for a tiny misalignment. Then, they were combined into a HDR image that was finally tone mapped. Settings similar to the "vivid-colors" preset were used. No further post-processing was applied. It is a perfect example when HDR processing is really useful. The fish eye lens gives so wide view that there easily fit areas that are illuminated extremely differently - ranging from the deep shadows, up to the very bright clouds. With the HDRi technique, taking a photo straight against the Sun is also not a big deal. Of course it is the photographers decistion which part of the histogram to clip and therefore achieve the wanted, more realistic, or more dramatic result. © Bartłomiej Okonek |
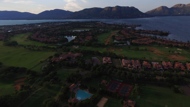 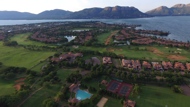 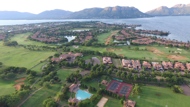 |
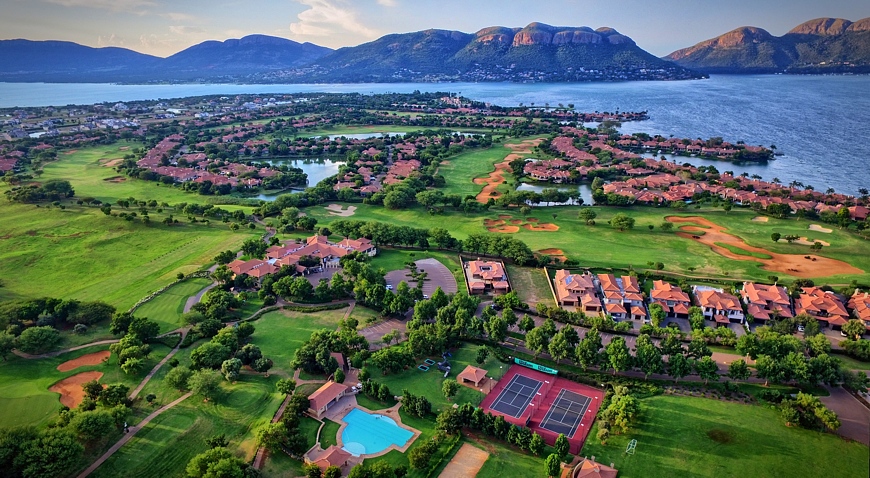 Real estate drone view HDR photo. Three differently exposed photos were taken by a drone, but only tiny alignment correction was necessary (done automatically by easyHDR). Tone mapping was done with the vivid-colors preset and some subtle vignetting effect was added. As the last step, free-hand rotation and cropping was applied. EasyHDR is useful in real-estate business, not only to process house interiors, but also for aerial photography that presents the estate's whereabouts to potential buyers in a neat, eye-catchy way. © Chris Muller |
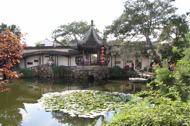 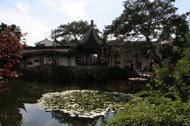 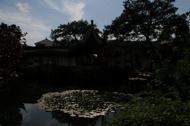 |
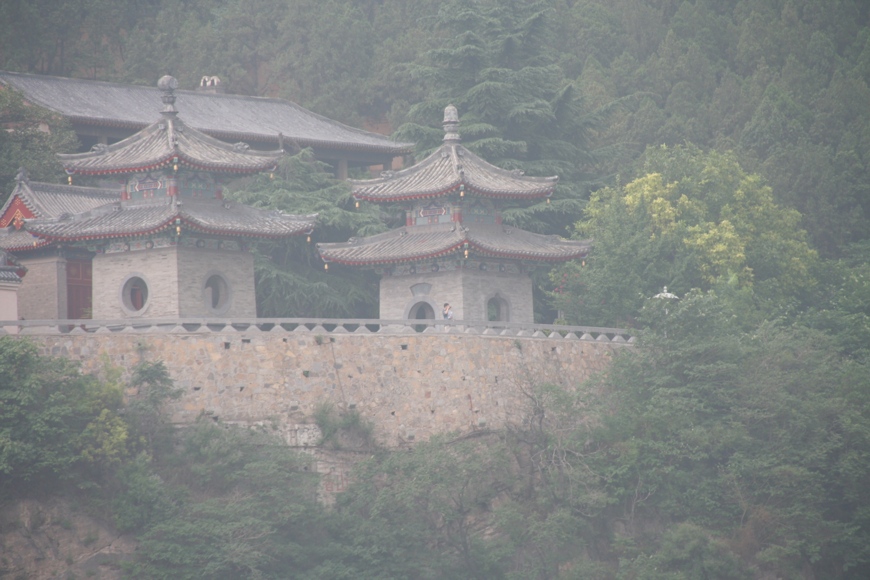
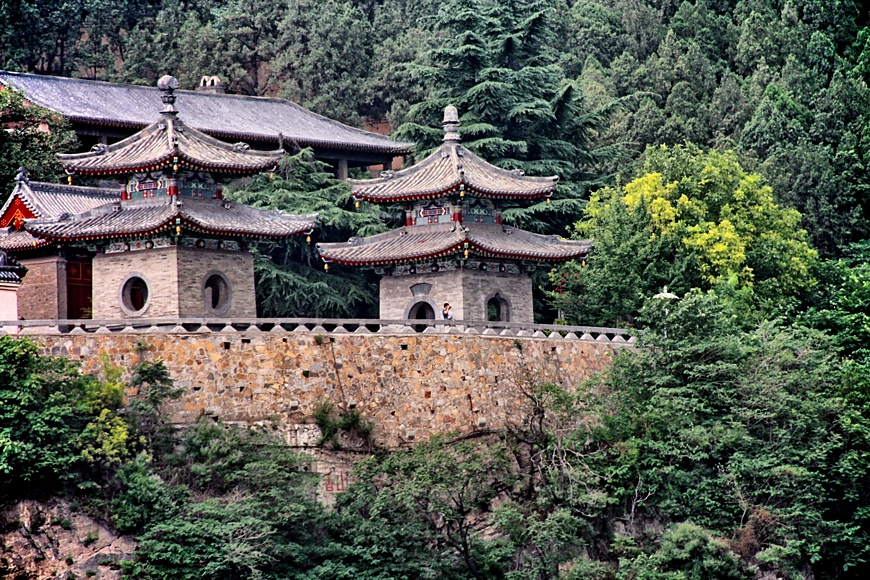
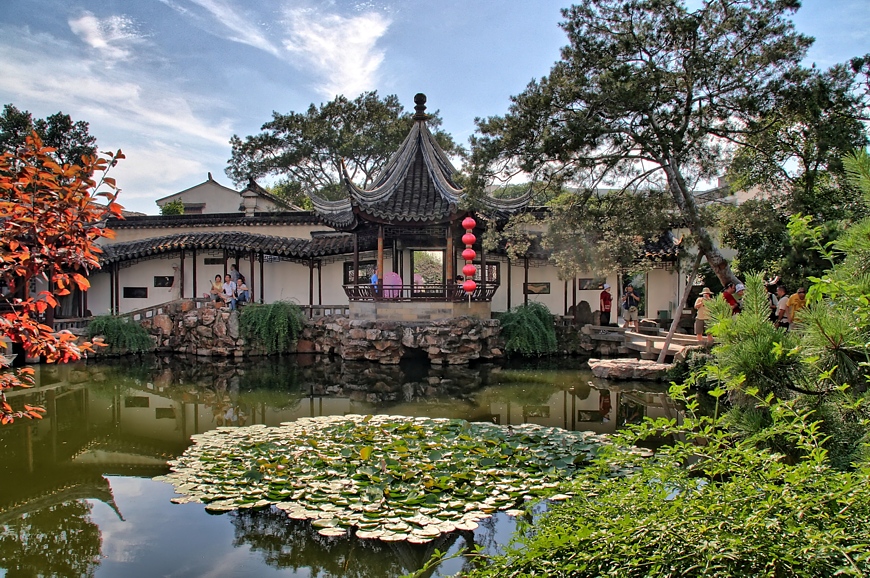 HDR picture. The Master of the Nets Garden in Suzhou, China. Three photos (AEB sequence) were taken without a tripod. The images were loaded into easyHDR, aligned automatically and merged into a HDR image using the True-HDR method with "balanced" selectivity. Manual ghost removal was used to repair ghosting caused by the moving people and tree leafs. © Bartłomiej Okonek |
 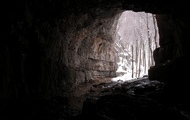 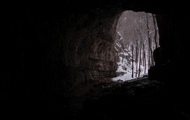 |
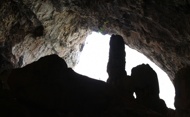
 Falkensteiner Höhle cave in southern Germany. Really, a high dynamic range image. Every scene like this is very hard to be properly photographed. If the cave's interior is to be visible on the photo, the view outside is overexposed. On the other hand, getting properly exposed exterior means that no details inside are visible. The above result was achieved by combining 4 photos to HDR using "Smart-Merge" method. The tone mapping parameters were default. © M.E.Erb |
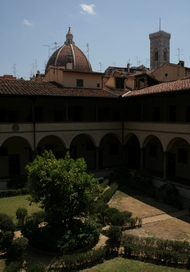 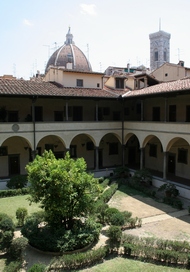 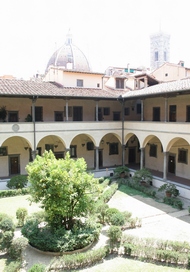 |
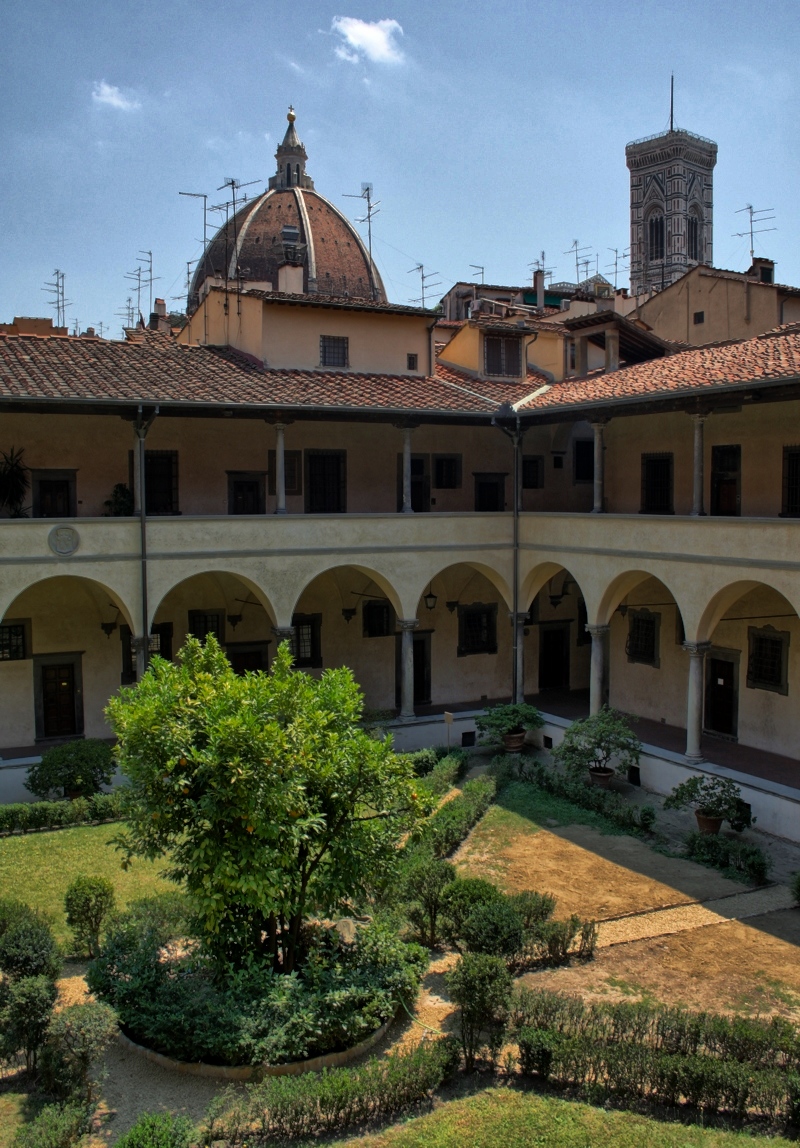 HDR photo of courtyard at the Laurentian Library in Florence, Italy. The goal was to achieve a very realistic result, bringing out the detail from the shadows, while keeping the sky blue. HDR image was generated using the True-HDR method with "normal" selectivity. Default tone mapping settings were changed a bit - gamma, saturation and local contrast's strength were slightly increased. Also the white clipping point was moved further right in order to preserve the detail in the clouds. © Bartłomiej Okonek |
 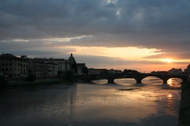 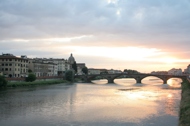 |
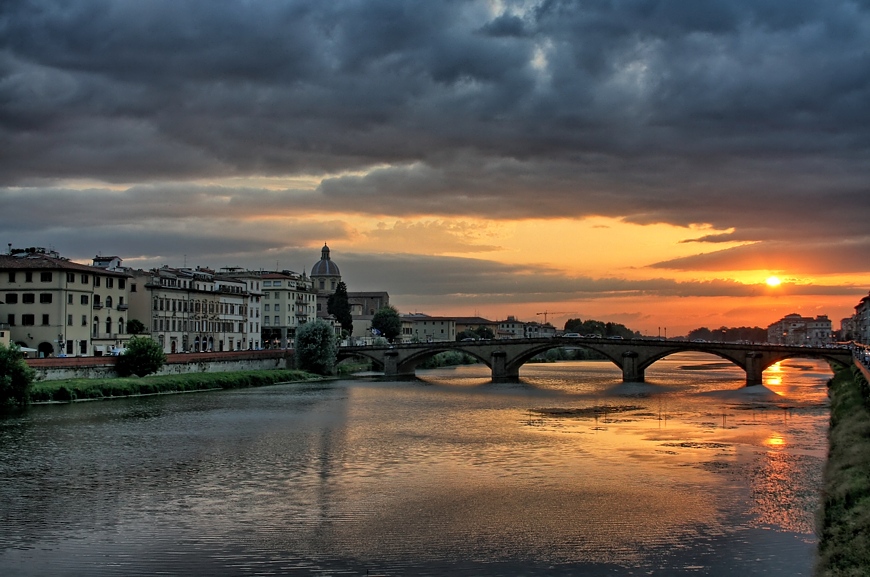 HDR sunset over the Arno river in Florence, Italy. View from Ponte Santa Trinita. Three photos were taken without a tripod, so they must have been aligned with easyHDR before being merged together. True-HDR method with "Normal" selectivity was used to generate the HDR image, that was later tone mapped. The tone mapping settings were just slightly modified in respect to the defaults. The "compression" was slightly increased to make the photo a bit brighter, without losing color saturation. Also the "Local contrast strength" was increased a bit to make the photo look more dramatic. © Bartłomiej Okonek |


|
Copyright © 2006-2024, Bartłomiej Okonek. All rights reserved. This webpage uses Icons8 icons. |
|
| Home | About easyHDR | Version history | Download | Buy now | Documentation | Examples | Support | Affiliate program | Sitemap | Privacy | ▲ Scroll to the top |

